Essential Cleaning Techniques to Keep Your Electric Kettle in Excellent Condition
Daily Exterior Maintenance to Enhance Your Kettle’s Visual Appeal
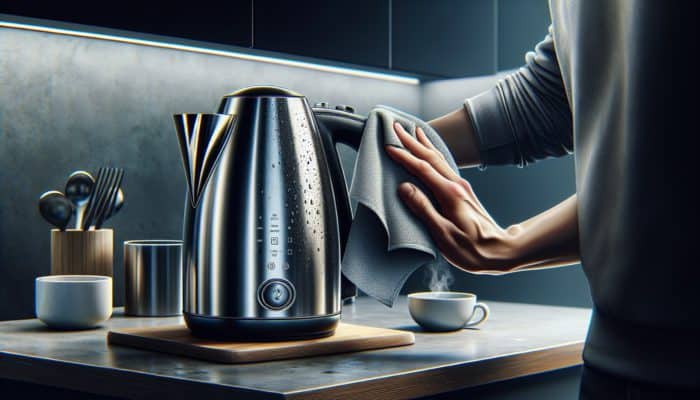
To maintain your electric kettle in superb condition, it is essential to establish a daily cleaning routine that includes a meticulous wipe-down of its exterior. This fundamental practice is not only simple but also vital for extending the lifespan of your appliance while preserving its attractive look. Use a soft, damp cloth to gently clean the kettle’s outer surfaces every day, effectively eliminating dust, fingerprints, and any grime that may accumulate over time. By ensuring that your kettle’s exterior remains spotless, you not only improve its visual appeal but also prevent the build-up of dirt, which could require more intensive cleaning later on. Regular attention to your kettle’s cleanliness reflects your commitment to maintaining a pristine kitchen environment.
Each time you use your kettle, steam and moisture can gather on its exterior, particularly in humid climates. Therefore, executing this daily wipe-down is increasingly important. A well-maintained kettle not only enhances the aesthetic aspect of your kitchen but also demonstrates your meticulousness in caring for your appliances. Remember, the exterior of your kettle is often the first thing that guests notice, so a spotless kettle creates a welcoming atmosphere in your home and exemplifies your hospitality. Maintaining a clean kettle can also prevent any unpleasant odours that might arise from moisture accumulation.
To elevate this straightforward daily cleaning routine, consider occasionally incorporating a mild detergent. Just a drop on your cloth can amplify your cleaning efforts, providing your kettle with a dazzling shine that looks fantastic, regardless of its material or model. A clean surface not only enhances your kettle’s visual attractiveness but also ensures it operates efficiently, free from the distractions of dust or unsightly stains. Regular care leads to a more enjoyable experience every time you brew your favourite beverages.
Weekly Interior Cleaning for Enhanced Functionality and Taste
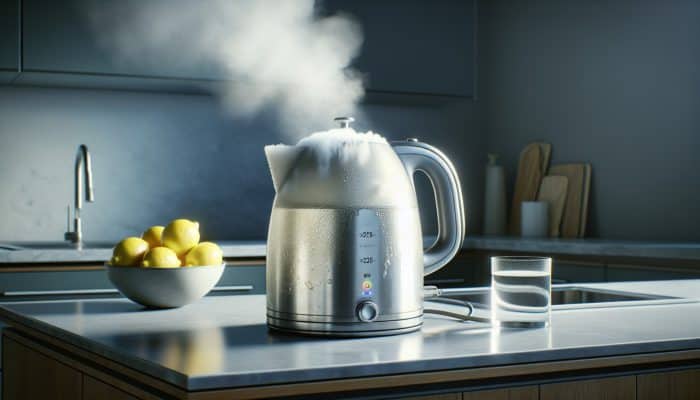
The interior of your kettle is crucial for the quality of the water you brew, making consistent interior cleaning essential for optimal performance and flavour. One highly effective method for descaling and deodorising your kettle involves a straightforward mixture of vinegar and water. Combine equal parts of vinegar and water, filling the kettle to about halfway full for effective descaling.
After preparing the mixture, bring it to a boil and allow it to sit for an hour before emptying it. This technique works wonders in removing limescale and mineral build-up that could adversely affect the taste of your hot beverages. Regular interior cleaning not only preserves the kettle’s functionality but also guarantees that each cup of tea or coffee you prepare is fresh and delightful, enhancing your overall drinking experience and ensuring that your beverages taste their absolute best.
Depending on the hardness of your water, you may need to adjust the frequency of this cleaning routine. In areas with particularly hard water, consider performing this cleaning twice a week for optimal results. After descaling, be sure to rinse the kettle thoroughly with clean water to eliminate any lingering vinegar residue, as this can negatively affect the flavour of your drinks. A clean kettle is key to ensuring that every cup you brew is enjoyable and refreshing.
Your weekly cleaning regimen should also include a careful inspection of the interior for any signs of wear or damage. By adhering to this cleaning schedule, you promote the longevity of your kettle, ensuring it remains a reliable companion in your daily routine and continues to deliver excellent results with every use. Regular maintenance helps prevent costly repairs or replacements down the line, making it a worthwhile investment in your kitchen appliances.
Monthly Deep Cleaning for Comprehensive Appliance Care
Once a month, dedicate some time to give your electric kettle a deep clean—think of this as a spa day for your appliance. This thorough cleaning process targets stubborn stains and mineral deposits that a quick cleaning might overlook. Baking soda is a powerful ally in this endeavour, renowned for its natural cleaning properties. Start by filling the kettle with water and adding several tablespoons of baking soda. Bring this mixture to a boil and allow it to sit for approximately 30 minutes.
This method not only combats tough stains but also neutralises any lingering odours, rejuvenating your kettle’s interior back to its original pristine state. After this cleaning cycle, be sure to rinse thoroughly to eliminate any residual taste in your beverages, ensuring that your next brew is as delightful as ever. A thorough clean helps prevent the accumulation of impurities that can affect the taste of your drinks.
In addition to using baking soda, consider utilizing an old toothbrush to scrub any particularly stubborn areas, especially around the spout or heating element. These spots can accumulate grime that often goes unnoticed. Regularly performing a deep clean will ensure that your kettle operates efficiently, and your brews taste exceptional, enhancing the overall quality of your hot beverages. Dedicating time for deep cleaning every month is an investment in the longevity and performance of your kettle.
A clean kettle translates to cleaner water, which can significantly elevate the health benefits of your tea or coffee. By dedicating this time each month to thorough cleaning, you extend the life of your kettle, ensuring it remains a beloved staple in your kitchen for years to come.
Effective Descaling Techniques for Your Electric Kettle
Employing the Vinegar Solution Method for Efficient Descaling
When it comes to effectively descaling your electric kettle, the vinegar solution method stands out as a reliable approach. This technique leverages the natural acidity of vinegar to break down limescale and other mineral deposits that accumulate over time. Begin by filling your kettle with equal parts of water and vinegar, ensuring there’s enough liquid to cover any visible scale.
Bring this mixture to a boil, allowing it to reach a rolling boil before switching off the heat. Let it sit for at least an hour; this duration enables the vinegar to penetrate the limescale effectively, ensuring thorough cleaning. After an hour, discard the solution and rinse the kettle thoroughly with clean water. This process not only cleans the kettle but also neutralises any vinegar odour, ensuring that your next brew is free from unwanted smells.
This method is not only effective but also environmentally friendly. Many households already have vinegar readily available, making it a cost-effective solution for maintaining your appliance. Moreover, you can customise the vinegar solution method based on the severity of the limescale; simply increase the concentration of vinegar for more stubborn deposits, ensuring that your kettle remains in top shape.
Regularly monitoring the cleanliness of your kettle is crucial. If you notice that limescale builds up quickly, consider implementing this descaling method bi-weekly. This proactive approach enhances your kettle’s performance while extending its lifespan, ensuring it continues to serve you well for many years to come.
Citric Acid Method as a Fresh Alternative for Descaling
For those seeking a natural alternative to vinegar, the citric acid approach offers an excellent option for descaling your electric kettle. Citric acid, naturally occurring in citrus fruits, effectively dissolves mineral deposits without the strong odour associated with vinegar. To begin, dissolve a tablespoon of citric acid in a full kettle of water, creating a potent descaling solution.
Bring the solution to a boil and simmer it for approximately 15-20 minutes. Once completed, switch off the kettle and let it cool. After cooling, carefully empty the kettle and rinse it thoroughly with clean water. This method not only cleans but also leaves your kettle smelling fresh, free from any harsh chemical scents, making it an appealing choice for many households.
The citric acid approach is especially beneficial for individuals who are sensitive to strong smells or those living in areas with hard water. Its natural composition makes it an appealing choice for environmentally conscious consumers. Additionally, citric acid is readily available in supermarkets and health food stores, making it a convenient cleaning solution for your needs.
Regularly employing the citric acid technique can significantly reduce scale buildup, ensuring your kettle remains in optimal condition and consistently delivers clean, crisp water for every cup. As with other descaling methods, adjust the frequency based on your usage and local water conditions for the best results.
Leveraging Commercial Descalers for Hassle-Free Maintenance
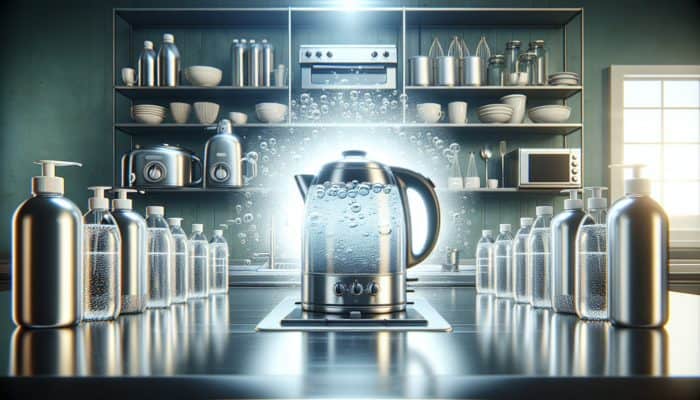
For those who prefer convenience, commercial descalers are specifically formulated to effectively tackle limescale and mineral deposits. When using a commercial descaler, always adhere to the manufacturer’s instructions to achieve optimal results. Typically, these products require you to add a specified amount of descaler to the kettle, fill it with water, and then boil the mixture.
This method is particularly advantageous for individuals who may not have the time or inclination to prepare natural alternatives. Commercial descalers are designed for quick and effective results, often delivering noticeable improvements within minutes. They are also formulated to minimise any risk of damage to the kettle, making them a safe choice for regular maintenance.
In addition to their effectiveness, many commercial descalers come in user-friendly packaging, complete with clear instructions suitable for both beginners and seasoned users. For those living in areas with particularly hard water, incorporating a commercial descaler into your cleaning routine can save time and effort, ensuring your kettle operates at its optimal level.
However, it’s wise to alternate between commercial and natural descaling methods. This variety not only ensures your kettle remains in excellent condition but also allows you to benefit from the unique qualities of both strategies. By maintaining a consistent descaling routine with commercial products, you will enhance your kettle’s performance and longevity, ensuring it remains a reliable kitchen tool.
Baking Soda Technique for Gentle Yet Effective Descaling
The baking soda technique presents a gentle yet highly effective method for descaling your electric kettle. This versatile ingredient is widely recognised for its cleaning capabilities and is a staple in many households. Start by filling your kettle with water and adding a few tablespoons of baking soda, creating a powerful cleaning solution.
Bring this solution to a boil, allowing the heat to activate the baking soda’s properties. After boiling, switch off the kettle and allow the solution to sit for approximately 30 minutes. The baking soda works to dissolve mineral deposits and neutralise unpleasant odours, making it a dual-purpose cleaner that enhances your kettle’s performance.
After the waiting period, carefully dispose of the solution and rinse the kettle thoroughly with clean water to eliminate any remaining baking soda residue. This method is particularly beneficial for those seeking an environmentally friendly cleaning solution. Baking soda is non-toxic and safe for your health, making it an ideal choice for families and individuals concerned about chemical exposure.
Incorporating the baking soda technique into your maintenance routine can significantly enhance the longevity of your kettle. It reduces the need for more aggressive cleaning strategies and helps keep your appliance in excellent working order. For optimal results, consider alternating between baking soda and other descaling methods to ensure comprehensive care for your electric kettle.
Comprehensive Exterior Maintenance for Your Electric Kettle
Polishing Your Kettle’s Surface for a Lasting Shine
The exterior of your electric kettle is more than just a protective shell; it reflects your personal style and the care you take with your appliances. To maintain its elegant appearance, regular polishing is essential. Use a soft cloth along with a mild detergent to wipe down the surface, ensuring you remove any stains or smudges that may detract from its beauty.
Over time, kettles can accumulate fingerprints, water stains, and dust, especially if they are frequently used or positioned in a busy kitchen. By dedicating a few moments each week to polish the surface, you can maintain its shine and prevent the buildup of grime. This simple act not only enhances the kettle’s aesthetic appeal but also ensures that it remains a stylish addition to your kitchen décor, making it a focal point that complements your interior design.
For stainless steel kettles, consider using a dedicated stainless steel cleaner. This product provides a protective layer that helps prevent tarnishing and scratching, ensuring your kettle maintains its appearance over time. By investing in the right cleaning supplies, you’ll ensure your kettle remains a stunning focal point in your kitchen, contributing to a well-kept environment.
In environments with high humidity or coastal climates, extra attention should be given to polishing the surface regularly to prevent damage. Moisture in the air can lead to corrosion, and a good polish acts as a barrier against the elements, keeping your kettle looking new and functioning effectively. Remember, a well-maintained exterior not only enhances the kitchen’s appearance but also signifies your commitment to quality and care in your kitchen.
Addressing Scratches for a Flawless Finish
Scratches on your electric kettle can be unsightly, but with a little attention, they can be managed effectively. Minor scratches can often be buffed out using a small amount of metal polish. Apply a tiny amount to a soft cloth and gently rub the scratched area in a circular motion. This technique can help restore the kettle’s surface and reduce the visibility of imperfections, enhancing its overall look.
For deeper scratches, you may need to consider a more intensive approach. Fine-grade sandpaper can be used to carefully sand down the scratched area, followed by polishing to restore the shine. Always exercise caution during this process, as excessive sanding can lead to a dull finish or damage the kettle’s surface. Regular attention to scratches is crucial for maintaining the kettle’s aesthetic appeal.
Regularly inspecting your kettle for scratches and addressing them promptly is essential for maintaining its aesthetic appeal. A well-maintained kettle enhances your kitchen’s overall ambiance and reflects your attention to detail. If your kettle is a focal point in your kitchen, ensure it consistently presents itself in the best possible light, showcasing your dedication to cleanliness and care.
To prevent future scratches, be mindful of where you place your kettle and what surfaces it comes into contact with. Using coasters or mats can help mitigate the risk of scratches from rough countertop surfaces. By taking these preventive measures, you’ll maintain the pristine appearance of your electric kettle for years to come, prolonging its lifespan and functionality.
Preventing Corrosion for Extended Lifespan
Corrosion can silently threaten your electric kettle, especially in humid environments. Prevention is key to ensuring that your appliance remains in top condition. After cleaning your kettle, always make sure it is thoroughly dried. Moisture can promote corrosion, particularly in areas where water accumulates, such as around the lid and base. By ensuring your kettle is dry, you can significantly reduce the risk of corrosion.
In coastal areas, the combination of salt and humidity can accelerate the corrosion process. To combat this, consider applying a thin layer of food-grade oil to the exterior surface of your kettle. This protective layer acts as a barrier against moisture, helping to prevent rust and corrosion from taking hold. Regularly applying this oil can prolong the life of your kettle, ensuring it remains a reliable kitchen companion.
Regularly inspecting your kettle for signs of corrosion is also essential. Check for any discoloration or flaking in the metal, particularly around the base and spout. If you notice any signs of corrosion, address them promptly to prevent further damage. Simple preventive measures, such as ensuring your kettle is dry after use and storing it in a cool, dry place, can significantly extend its lifespan, allowing it to serve you well for years.
In addition to these steps, consider using silica gel packets in the storage area of your kettle to absorb excess moisture. By taking proactive measures to prevent corrosion, you can ensure that your electric kettle continues to serve you well, providing you with hot water and beverages for years to come.
Effectively Removing Stains for a Pristine Appearance
Stains on the exterior of your electric kettle can detract from its elegance, but with the right approach, they can be effectively removed. Begin by using a non-abrasive cleaner suitable for your kettle’s material. Apply a small amount to a soft cloth and gently rub the stained area, taking care not to scratch the surface.
Stains may arise from various sources, including spills or residue from food and drinks. Regular cleaning can help prevent stains from setting in; however, if they do occur, acting quickly is essential. For stubborn stains, consider using a paste made from baking soda and water. Apply this paste to the stain, let it sit for a while, and then gently scrub using a soft cloth, ensuring that the surface remains unharmed.
Always rinse the kettle thoroughly after cleaning to ensure no cleaning products remain on the surface. This step is crucial, as residues from cleaners can seep into your drinks, altering their taste. By keeping the exterior of your kettle clean and stain-free, you maintain its aesthetic appeal and ensure it remains a stylish addition to your kitchen, reflecting your care for your appliances.
In addition to regular cleaning, consider implementing preventive measures, such as using coasters or trays beneath the kettle to catch spills. By being proactive and attentive to detail, you can keep your electric kettle looking and functioning well for years to come, enhancing your overall kitchen experience.
Protecting Against Rust for Optimal Functionality
Rust is a common concern for metal appliances, particularly in coastal regions where salt and humidity can cause significant damage. Protecting your electric kettle from rust involves a combination of regular maintenance and preventive measures. Begin by thoroughly cleaning the kettle, ensuring it is completely dry before storage. Any remaining moisture can lead to the formation of rust, impacting the kettle’s performance.
Applying a thin layer of food-grade oil to the kettle’s exterior can serve as an effective deterrent against rust. This layer creates a barrier against moisture and protects the metal surface. When applying oil, use a soft cloth to ensure an even coat, taking care to cover all exposed areas for maximum protection against rust.
Additionally, consider the environment in which your kettle is stored. Keeping it in a dry, well-ventilated area can significantly reduce the risk of rust. Avoid storing it in enclosed spaces where humidity can build up, as this can lead to corrosion and damage over time. By being mindful of storage conditions and regularly inspecting for signs of rust, you can keep your kettle in excellent condition, allowing it to serve you well for many years.
If you notice rust forming, address it immediately by using a fine steel wool pad to scrub away the rust gently. Afterwards, rinse thoroughly and dry completely. Following this process will help you maintain the integrity of your electric kettle, ensuring it continues to provide you with hot water for your beverages.
Thorough Care for the Lid and Spout of Your Kettle
Deep Cleaning the Lid for Enhanced Hygiene
The lid of your electric kettle is often overlooked during routine cleaning, yet it plays a crucial role in both functionality and hygiene. To clean the lid effectively, remove it from the kettle and soak it in warm, soapy water. This method helps loosen any built-up grime or stains, ensuring a thorough clean.
After soaking, use a soft sponge or cloth to scrub the lid gently, paying special attention to crevices where dirt may accumulate. It’s crucial to ensure that all parts of the lid are thoroughly cleaned, as residue can affect the taste of your beverages. Rinse the lid under running water to remove any soap residue before reattaching it to the kettle.
For those living in humid environments, the lid can also become a breeding ground for mould if not cleaned regularly. To avoid this, consider using a disinfectant spray after cleaning to eliminate any remaining bacteria. Make sure the lid is completely dry before reassembly to prevent moisture buildup, which can lead to further hygiene issues.
Regularly cleaning the lid not only maintains hygiene but also ensures the kettle operates efficiently, as a clean lid helps create a proper seal during boiling. By dedicating time to this often-neglected component, you enhance both the functionality and longevity of your electric kettle, ensuring that it remains a reliable kitchen tool.
Unclogging the Spout for Uninterrupted Flow
Clogged spouts can disrupt the flow of water in your electric kettle, leading to frustration during use. A small brush or pipe cleaner can be your best ally when it comes to unclogging the spout. These tools can easily reach the narrow opening and remove any buildup causing blockages, ensuring a smooth pouring experience.
Start by inspecting the spout for any visible obstructions. If you see scale or debris, gently insert your brush or pipe cleaner and work it back and forth to dislodge the blockage. After unclogging, rinse the spout thoroughly with warm water to ensure no particles remain, thus maintaining the quality of your water flow.
Maintaining a clean spout is essential not only for efficiency but also for hygiene. Water can stagnate in a blocked spout, leading to potential health risks. Regularly checking and unclogging the spout will enhance your kettle’s performance, ensuring every pour is smooth and effortless. This simple maintenance task can prevent larger issues from developing over time.
If you reside in an area with hard water, consider incorporating regular descaling into your routine to prevent buildup in the spout. By being proactive in caring for this part of your kettle, you’ll ensure it remains functional and effective for all your hot beverage needs, contributing to a better overall experience in your kitchen.
Lubricating Hinges for Seamless Operation
The hinges of your kettle lid often go unnoticed during cleaning routines, yet they are crucial for smooth operation. Over time, these hinges can become stiff or squeaky, affecting the kettle’s functionality. To ensure they operate smoothly, a drop of food-grade lubricant can work wonders, significantly enhancing the user experience.
Begin by applying a small amount of lubricant to the hinges. Gently open and close the lid several times to work the lubricant into the mechanisms. This not only keeps the hinges operating smoothly but also prevents wear that can lead to malfunction over time, enhancing the overall functionality of your kettle.
Regular lubrication is especially important for kettles that are frequently used, as constant movement can wear down the hinges. By incorporating this simple step into your maintenance routine, you can extend the life of your kettle and ensure it remains a reliable part of your kitchen arsenal. Properly functioning hinges contribute to the overall ease of use of your appliance.
In environments with high humidity, lubricating the hinges can also help prevent rust from forming. By taking the time to care for these small components, you not only maintain the kettle’s functionality but also extend its overall lifespan, ensuring it continues to serve you well.
Filter Maintenance for Quality Water from Your Electric Kettle
Removing and Cleaning the Filter for Fresh Water
The filter in your electric kettle plays a crucial role in ensuring the quality of the water you boil. Regular maintenance of this component is essential for optimal performance. Begin by carefully removing the filter from the kettle, following the manufacturer’s instructions for safe removal to avoid damaging the unit.
Once removed, hold the filter under running water to rinse away any debris or mineral deposits. Consider using a soft brush to gently scrub the filter, particularly if you notice any stubborn buildup. By keeping the filter clean, you enhance the quality of your water, ensuring that every cup of tea or coffee tastes fresh and pure, promoting a superior drinking experience.
In regions with hard water, this cleaning process should be performed weekly to combat the rapid accumulation of scale. Neglecting this step can lead to decreased efficiency and, over time, damage to the kettle. A clean filter is essential for maintaining the kettle’s overall performance and ensuring that your beverages are consistently enjoyable.
After cleaning, ensure the filter is completely dry before reattaching it to the kettle. This will prevent moisture retention, which can lead to mould growth. By making filter maintenance a regular part of your routine, you’ll not only enhance the kettle’s performance but also improve the quality of your beverages, ensuring that every sip is delightful.
Replacing the Filter for Optimal Performance
Over time, your kettle’s filter will wear out and need to be replaced. Manufacturers typically recommend replacing the filter every few months, although this interval can vary depending on usage and water quality. Regularly inspecting the filter for any signs of damage or wear is crucial; if you notice any tears, cracks, or significant discoloration, it’s time for a new filter to maintain cleanliness.
Replacing the filter not only ensures the quality of your water but also enhances the kettle’s overall efficiency. A worn-out filter can lead to poor water quality, adversely affecting the taste of your beverages. When purchasing a new filter, ensure that you select the type that is compatible with your specific kettle model, as this will ensure optimal performance and functionality.
Keep in mind that some kettles feature built-in filters that are not easily replaceable. In such cases, consult your manufacturer’s guidelines for maintenance and replacement options. By staying proactive about filter replacement, you can guarantee your kettle continues to function optimally, providing you with delicious hot beverages that meet your standards for quality.
Incorporating a reminder for filter replacement into your cleaning routine can help ensure that this essential maintenance step doesn’t slip your mind. By prioritising filter care, you enhance both the longevity of your kettle and the quality of your drinks, making every cup a pleasure to enjoy.
Checking for Damage to Maintain Performance
Regular inspections of your kettle’s filter are vital for maintaining its functionality. Over time, filters can deteriorate due to wear and tear, resulting in decreased efficiency and potential issues with water quality. During your routine checks, look for any signs of damage, such as cracks or discoloration. If you find any irregularities, it’s best to replace the filter immediately to maintain optimal performance and ensure safe drinking water.
In addition to visual inspections, consider conducting water quality tests periodically. This can help identify any contaminants that may be present, indicating that your filter may need replacement sooner than anticipated. By taking a proactive approach to filter maintenance, you can ensure that your electric kettle operates efficiently and provides clean, safe water for your beverages, contributing to a healthier lifestyle.
Regularly checking for damage not only safeguards the quality of your drinks but also extends the lifespan of your kettle. A compromised filter can lead to issues with the kettle’s heating element and overall functionality, making it crucial to address any signs of wear promptly. By incorporating these checks into your routine, you ensure your kettle remains a reliable kitchen tool.
As with other maintenance tasks, establish a schedule for checking your filter. This can be incorporated into your regular cleaning routine, ensuring you remain attentive to this essential component of your kettle, enhancing your overall kitchen efficiency.
Proper Storage of the Filter for Longevity
Proper storage of your kettle’s filter is essential for prolonging its lifespan and maintaining its effectiveness. When not in use, always store the filter in a dry, cool place. Avoid areas with high humidity or direct sunlight, as these conditions can promote mould growth and degrade the filter material.
If the filter is removable, consider placing it in a dedicated storage container to prevent accidental damage. This is particularly important if you have multiple filters or accessories for your kettle. By keeping the filter safe and secure, you ensure it remains in excellent condition for future use, ready to deliver quality water when needed.
In addition to proper storage, consider keeping a record of your filter’s lifespan to ensure optimal performance. Many manufacturers provide guidelines on how long filters should last based on usage and water quality. By staying informed, you can anticipate when it’s time to replace the filter, ensuring uninterrupted performance of your kettle.
Maintaining proper storage practices for your filter is a simple yet effective way to guarantee your kettle remains functional and efficient. By prioritising this step, you contribute to the overall care of your electric kettle, ensuring it continues to meet your needs over time.
Lubricating the Filter for Efficient Operation
Ensuring a proper fit for your kettle’s filter is essential for optimal performance. A well-fitted filter not only keeps impurities out but also reduces the risk of leaks during operation. Applying a recommended lubricant to the filter’s seals can enhance this fit, ensuring a snug seal that prevents any unwanted water escape.
When lubricating the filter, use food-grade lubricant to ensure safety during operation. A drop of lubricant on each seal will suffice; it’s essential not to overdo it, as excess lubricant can attract dirt or impurities. After applying, reattach the filter and check for any movement or looseness. A secure fit will contribute to the overall efficiency of your kettle, ensuring that it performs at its best.
Regular lubrication of the filter seals is particularly important for kettles that are used frequently. By ensuring a proper fit, you enhance the kettle’s ability to produce clean, quality water for your drinks. This proactive maintenance step will not only improve performance but also prolong the lifespan of your kettle, making it a valuable part of your kitchen.
Incorporate filter lubrication into your regular cleaning routine. This attention to detail will enhance the functionality of your kettle, ensuring that every cup of tea or coffee is brewed to perfection and meets your expectations.
Safe Storage and Usage Practices for Your Kettle
Guidelines for Proper Storage of Your Electric Kettle
Proper storage of your electric kettle when not in use is crucial for preventing mould and mildew growth. Always store your kettle in a dry area, away from excessive moisture. If your kettle has a removable filter, ensure it is completely dry before storing, as retained moisture can lead to unpleasant odours and potential health risks.
Consider placing your kettle on a dedicated shelf or in a cupboard where it can be protected from dust and other kitchen contaminants. Avoid placing heavy items on top of the kettle, as this can cause damage over time. Proper storage ensures that your kettle remains clean and ready for use whenever you need it, contributing to a more organised kitchen space.
In addition to keeping the kettle dry, ensure that the electrical cord is neatly stored to prevent tangles and potential damage. A tidy storage arrangement will prolong the life of your kettle and maintain its functionality, allowing for easy access whenever you need hot water.
By taking the time to establish proper storage practices, you ensure that your electric kettle remains in excellent condition, ready to provide you with hot water for your favourite beverages at a moment’s notice, enhancing your overall kitchen experience.
Avoiding Overfilling for Safety and Efficiency
Overfilling your electric kettle can lead to boiling water spilling over, causing potential burns or damage to the appliance. Always be mindful of the maximum fill line indicated inside the kettle. This line indicates the safe capacity for boiling water without risking overflow, ensuring safety during use.
In addition to preventing accidents, adhering to the maximum fill line can enhance the kettle’s efficiency. Kettles are designed to heat specific volumes of water quickly, and exceeding this capacity can lead to longer heating times and increased energy consumption, making it less efficient. This practice not only saves energy but also promotes safety in your kitchen.
To further reduce the risk of overfilling, consider pouring water into the kettle from a measuring jug. This will help you accurately gauge the amount of water you’re adding. If you’re unsure about how much water to use, always err on the side of caution and fill less rather than more, ensuring a safe and efficient boiling process.
By avoiding overfilling, you safeguard your kitchen and ensure your kettle operates efficiently, providing you with hot water whenever you need it without unnecessary risks. This simple precaution can save you from potential accidents and enhance your overall experience with your kettle.
Regular Inspection for Ongoing Maintenance
Regularly inspecting your electric kettle is essential for identifying signs of wear or damage before they escalate into serious issues. Examine the exterior for any scratches or rust, and check the spout and lid for blockages or damage. A simple visual inspection can help you catch potential problems early, ensuring your kettle remains functional and safe for use.
Pay special attention to the electrical cord and plug during inspections. Look for fraying or exposed wires, as these can pose significant safety hazards. If you notice any issues, consult the manufacturer’s guidelines or a professional for repairs to mitigate risks and ensure your kettle remains safe for regular use.
In addition to visual inspections, consider regularly testing the kettle’s functionality. Ensure that it heats water efficiently and that the automatic shut-off feature operates correctly. By being proactive in your inspections, you extend the lifespan of your kettle and ensure it continues to serve you well, delivering hot water for all your beverage needs.
Develop a routine for these inspections, perhaps aligning them with your cleaning schedule. By committing to regular checks, you enhance the safety and performance of your electric kettle, ensuring it remains a reliable part of your kitchen essentials for years to come.
Frequently Asked Questions about Electric Kettle Care
What is the recommended cleaning frequency for my electric kettle?
It’s advisable to perform a daily wipe down, a weekly interior clean with vinegar, and a monthly deep clean using baking soda. This routine will help maintain your kettle’s performance and appearance while ensuring safe drinking water for all your hot beverages.
Can I substitute lemon juice for vinegar when descaling my kettle?
Yes, lemon juice serves as a natural descaler due to its acidity and can be effectively used in place of vinegar for descaling your kettle, providing a fresh scent while cleaning.
What should I do if my kettle has a persistent stain?
For stubborn stains, create a paste of baking soda and water, apply it to the stain, let it sit for a while, and then scrub gently before rinsing thoroughly to restore the kettle’s appearance and cleanliness.
How can I prevent limescale buildup in my kettle?
Regular descaling using vinegar or citric acid is an effective method. Additionally, using filtered water can help reduce mineral buildup, enhancing water quality and kettle performance significantly.
Is it safe to place my kettle in the dishwasher?
Most electric kettles are not dishwasher safe. Always refer to the manufacturer’s instructions regarding cleaning and maintenance to avoid damage to the kettle’s components and ensure its longevity.
How do I determine when to replace the filter in my kettle?
Generally, filters should be replaced every few months or when you notice a reduction in water quality or flow. Check the manufacturer’s guidelines for specific recommendations to maintain optimal performance and water quality.
What is the best method for storing my kettle?
Store your kettle in a dry place, ensuring it is completely dry before putting it away. Avoid storing it in humid areas to prevent mould growth and ensure longevity, keeping it ready for use at any time.
Can I use commercial descalers regularly?
Yes, commercial descalers can be used regularly, but it’s advisable to alternate between commercial and natural methods to maintain a balanced and effective cleaning routine for your kettle.
What should I do if my kettle starts to develop rust?
If rust is present, scrub it gently with fine steel wool, rinse thoroughly, and dry completely. To prevent future rust, ensure proper cleaning and storage practices are followed consistently, keeping your kettle in optimal condition.
Why is it important to lubricate the hinges of my kettle?
Lubricating the hinges ensures smooth operation and prevents wear over time. This simple maintenance task can reduce the risk of squeaking and extend the lifespan of your kettle, enhancing your overall experience.
Connect with us on Facebook!
The post How to Maintain Your Electric Kettle: Essential Tips appeared first on https://cookinggods.com
The Article Essential Tips for Maintaining Your Electric Kettle Was Found On https://limitsofstrategy.com
References:
https://limitsofstrategy.com/essential-tips-for-maintaining-your-electric-kettle/